
So We’re Building a Brewery Pt. 2
So last week I outlined the range of what we wanted to be able to do with our over-engineered brew kit. What started out as a small pilot brewhouse got quickly out of control when we decided the only limitation we were happy with was volume output. We kind of welcomed that part in the spirit of R&D. This week I just want to go into the reasons why we’ve chosen to do this and how we got there.
Although a 500L kit should by virtue of its small volume hopefully command a lower price we’d realised there’s plenty on instances where we’re going all out on modern technology and once we’re invested in even half of that, we’ve to make this kit work for all the beer and the volume demands that go with that. We still wanted to have the flexibility of being able to brew small batches of beer regularly to keep pushing ourselves but if we were going to jump in this deep, I had to start thinking about how to work this right. Luckily I had experience in regular 24hr shift brewing and the planning of this. We didn’t want to run this thing 24hrs a day as that’s not why we started Whiplash but that doesn’t mean you can’t learn the lessons from that and apply the principles elsewhere.
More vessels basically means splitting up processes like mashing, wort separation, boiling and whirlpooling. It’s not necessary for many microbreweries as they can can pick the size of kit that works for them, focus on one or two beers a day and that’ll dictate the limit of beer they can put out a week. We’d gone into this wanting the flexibility to be able to put out a few beers a week and be able to really dial in consistency over lots of successive brews so a system like this works for us. We also don’t want to have to make too big a batch of beer in case it sits around for longer than the hops stay fresh - so having flexible batch increments allows you to make exactly how much is required for fresh drinking.
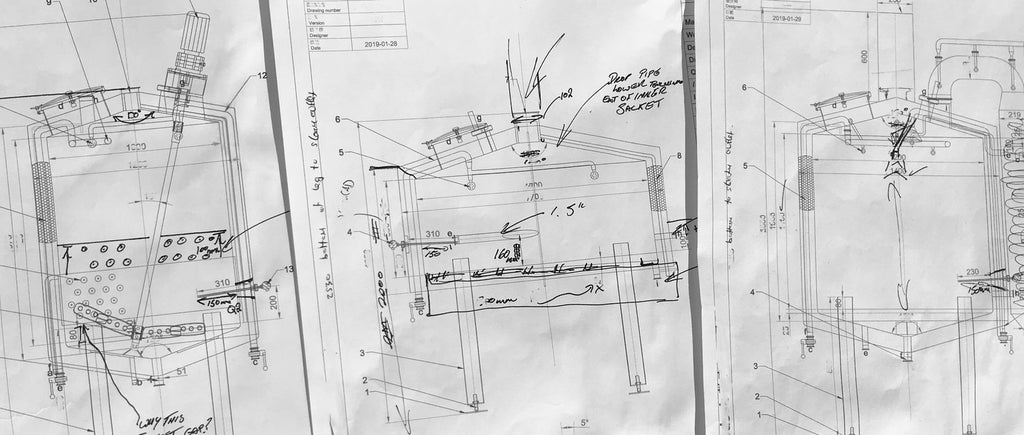
So here’s how the kit works
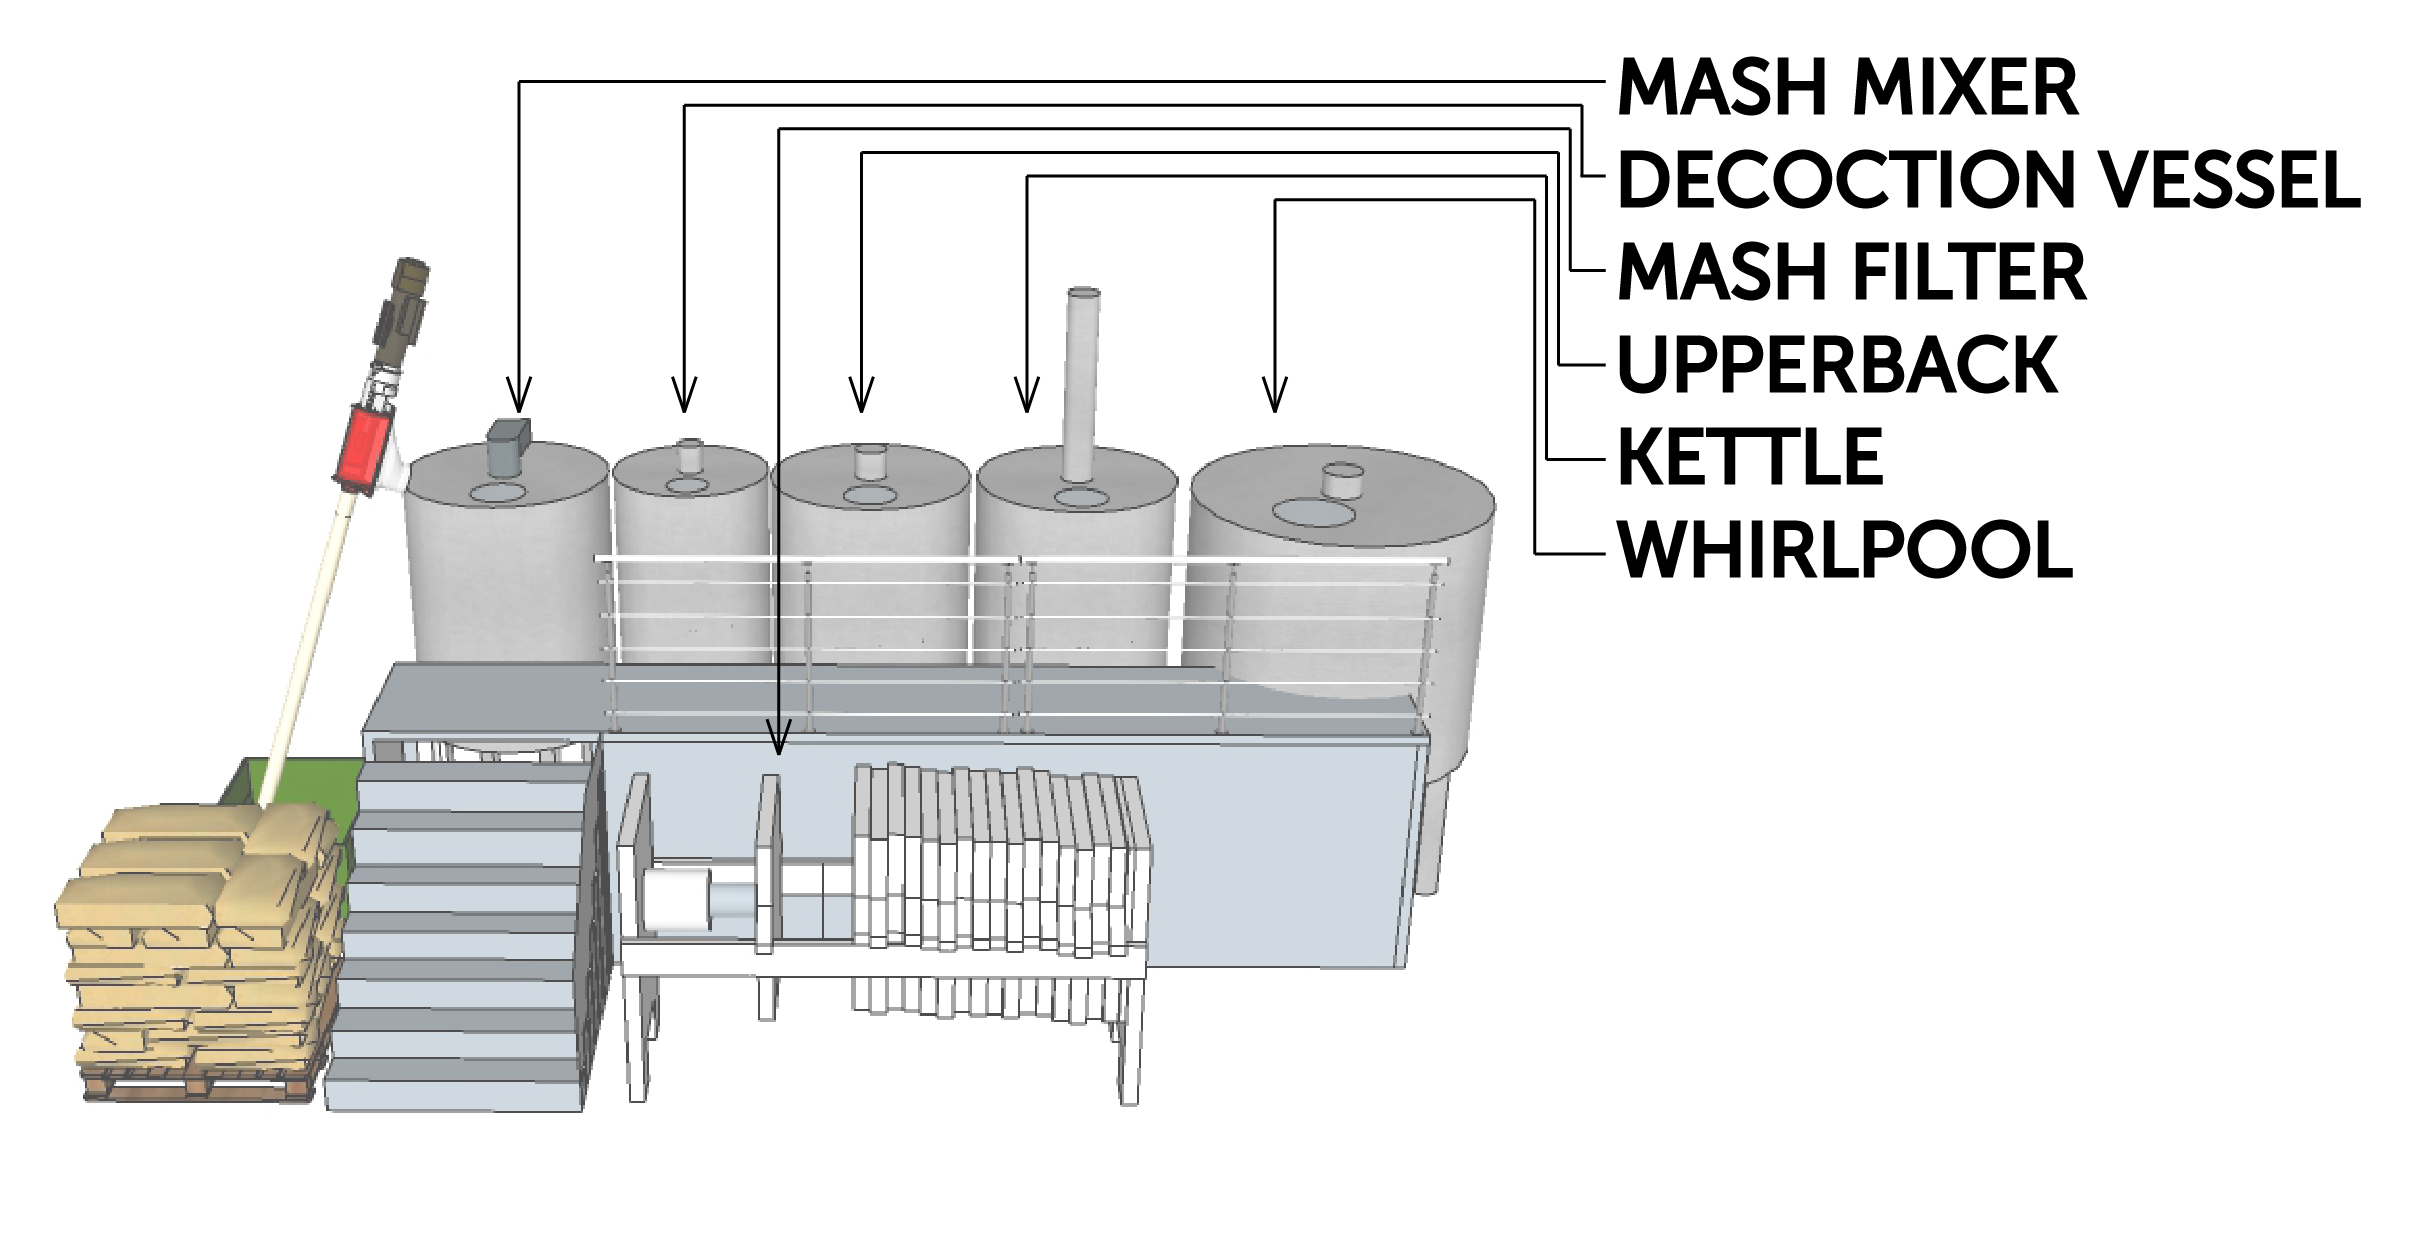
Mash Mixer
This is where we mix the milled barley and cereals with water to convert the starch into fermentable sugars. This vessel is temperature adjustable while the mash is happening and that’s really important to us and how we brew beers like Northern lights, Rollover, Body Riddle and our Lagers. It gives us way better consistency in the final body of the beer too.
Decoction Vessel / Cereal Cooker
Decoction baby! Even back when I was homebrewing I’d apply decoction pretty regularly to my brews as the caramelisation flavour it imparts in the malt has no real substitute. Melanoidin malt will get you close but it’s not the same. This tank will also be useful for mashing some weird cereals like rice and buckwheat in the future too which we’ve a few plans for.
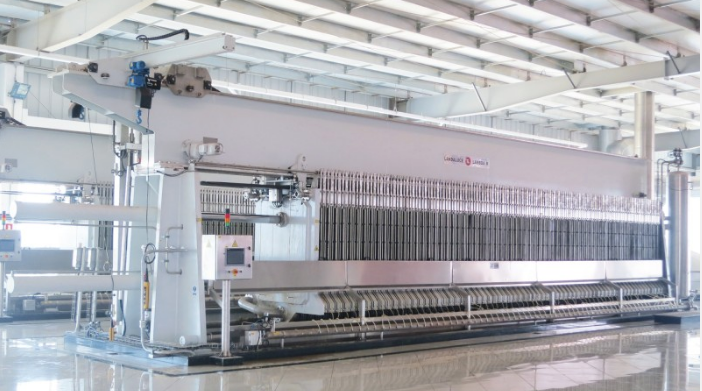
Mash Filter
The mash filter is going to get its own post soon but basically this unit is a very fancy mash separation vessel very rarely seen in craft brewing. It gives 100% extract, never sticks and allows you to mash with whatever types of grain you want whereas mash tuns and lauter tuns require the brewer to use at least 50% normal barley malt with a husk for creating the filter bed. Honestly this is the coolest part of the system and I can’t do it justice in a paragraph so more to come.
Wort Receiver / Upperback
This is a pretty boring but hugely useful tank. Basically it allows you to mash more regularly and store the wort nice and warm while it’s waiting for the kettle to free up on busy brew days. This vessel gives us the capability to brew every 2 hours.
Boil Kettle
Although you’d think this would be a straightforward tank it’s actually got the most detail and planning in the setup. We’ve designed our wort kettle to work with an external boiler so that we can circulate in here and ensure we don’t have any nasty left over compounds from the wort. We’ve also added on a special vapour trap that’ll allow us to recoup lots of the heat in the steam for our hot water used later for brewing, reducing our need for gas and making the process more energy efficient and sustainable.
Whirlpool
If you’ve read our beer releases on instagram and facebook you’ll know we use most if not all of our hops in the whirlpool before dry hopping. Doing it this way preserves more of the natural oils from the hops in our beers. I’ve designed this whirlpool to be super efficient in terms of wort recovery and it allows us to fit more hops in there and push all our beers that bit further.
There’s other hidden bits and pieces in amongst all of this but that’s the gist of what each of those do. Next week we’ll delve into the world of mash filters…
While you’re here you’re probably aware we’re throwing an almighty party in the Mansion House in Dublin in a couple of weeks. There’s still a few tickets available to attend the greatest beer selection that Ireland’s ever seen so pop over to eventbrite here to join us.
https://www.eventbrite.com/e/fidelity-beer-festival-2019-tickets-60077753177